Advanced Templates
Table of Contents
Overview
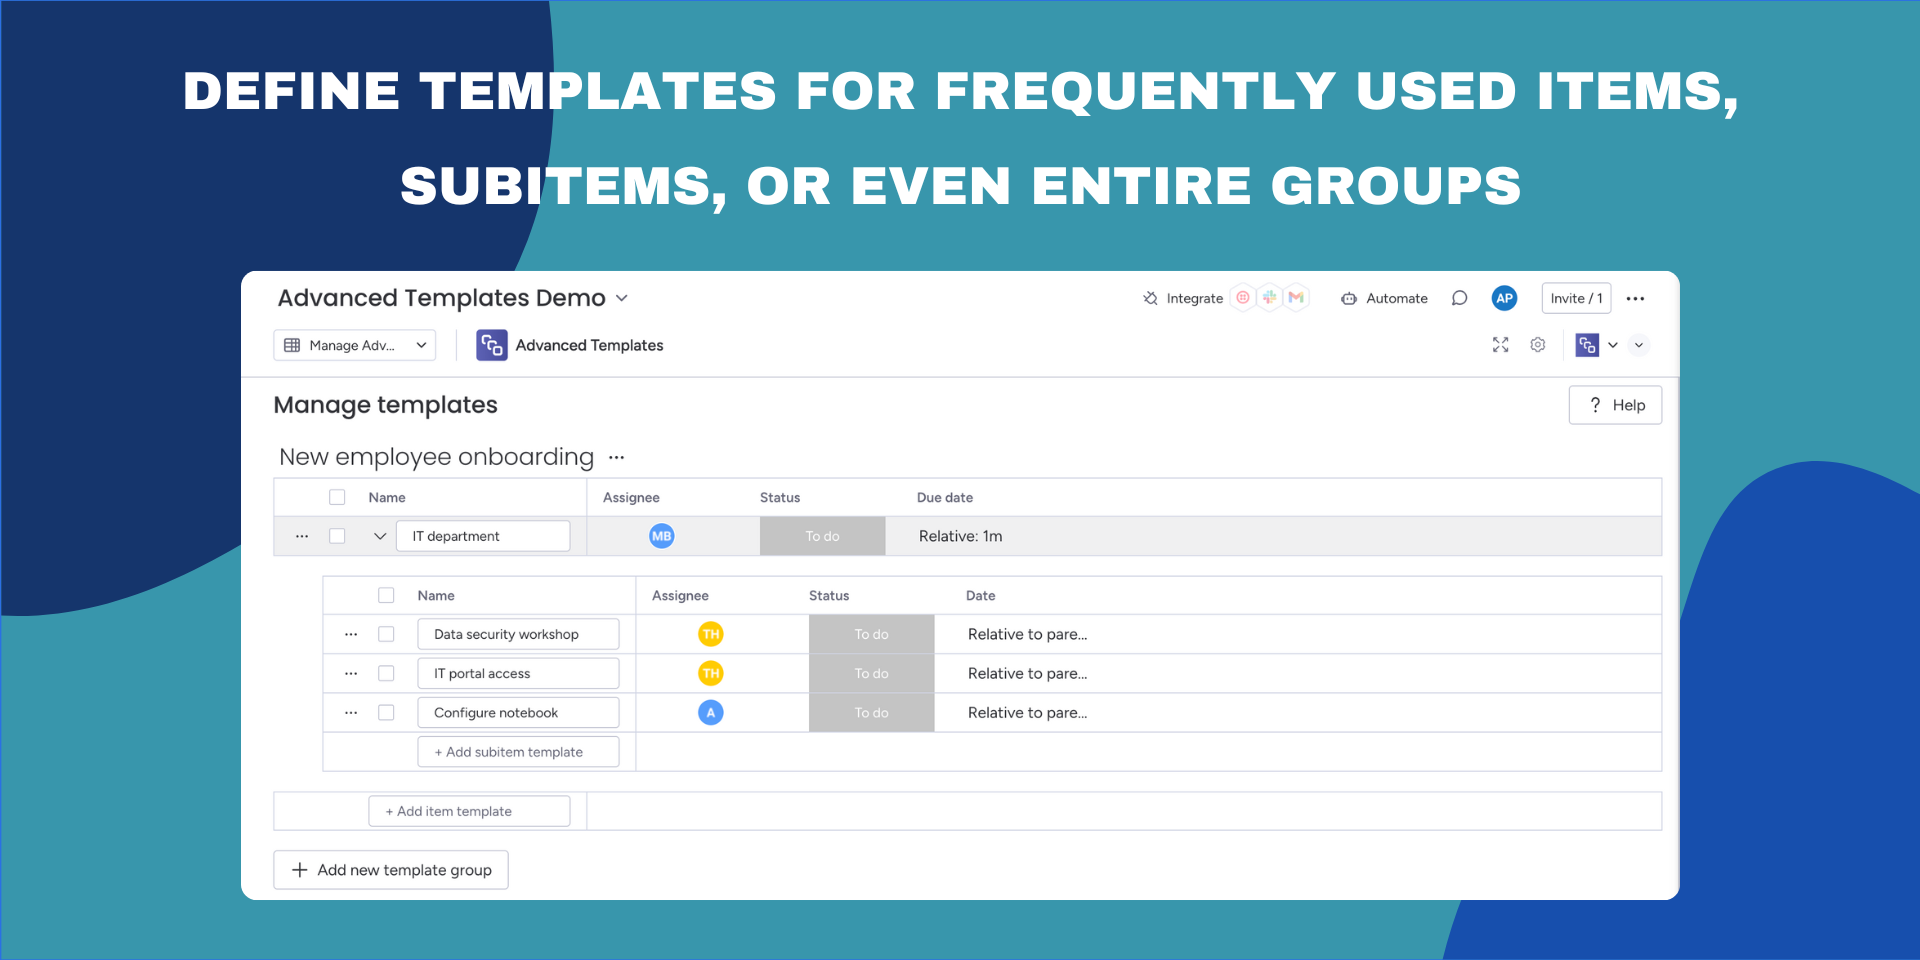
Enhance your workflow efficiency with Advanced Templates. Easily create and reuse board group, item, and subitem templates for seamless task management across your organization.
Installation
Install from monday.com apps marketplace or click the button below.
Key Features:
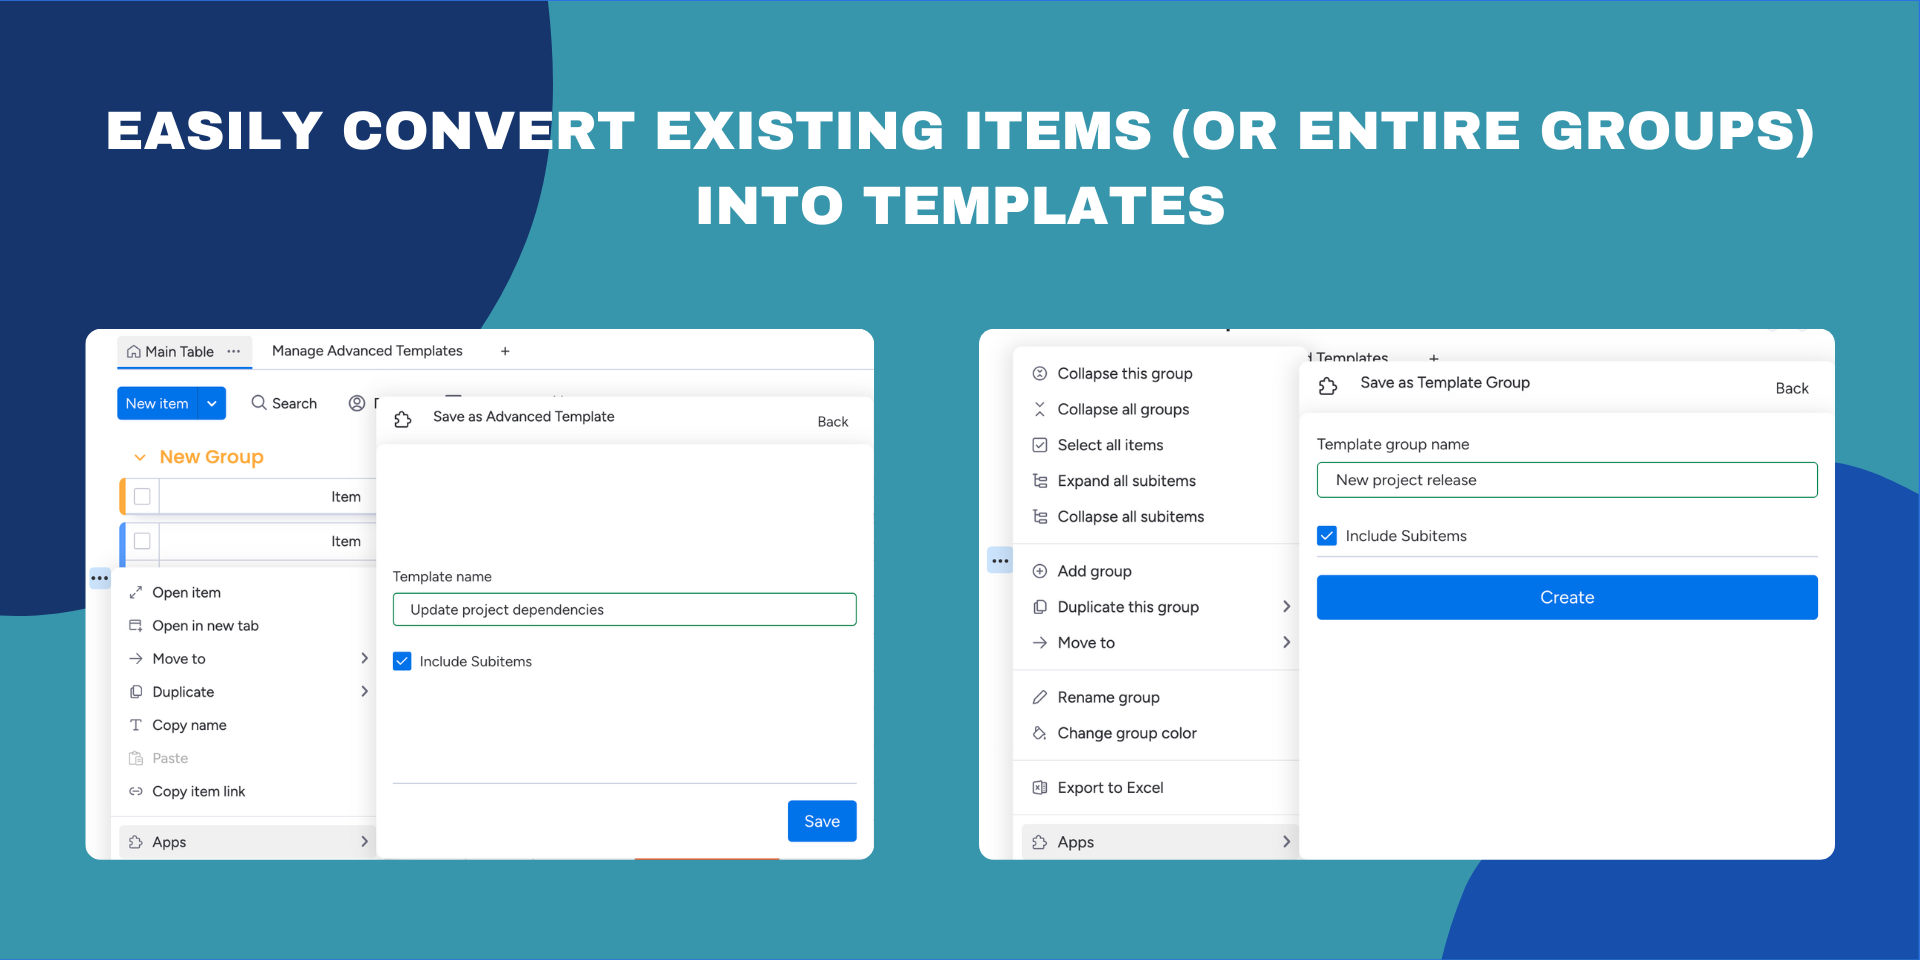
- Template Creation: Define and reuse group, item, and subitem templates fine-tuned for your particular use case. You can also convert existing items into reusable templates with a single click!
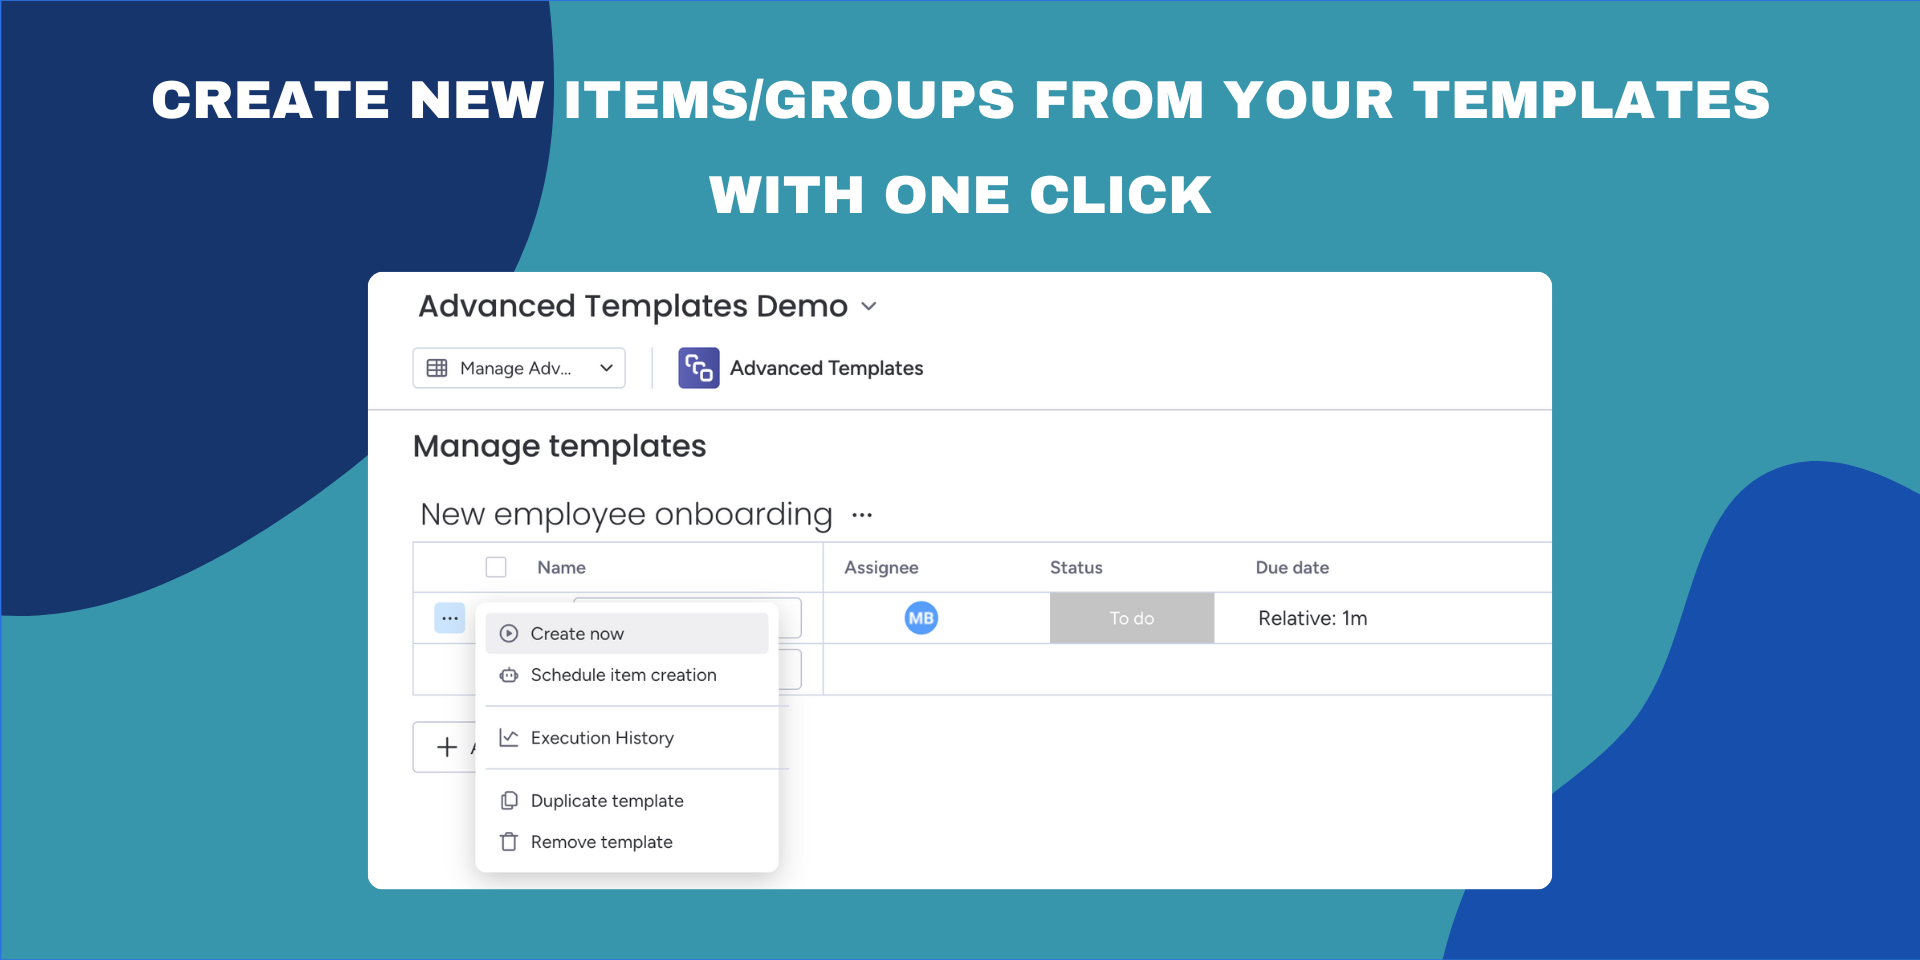
- Manual Item Creation: Quickly create new items or groups from your saved templates.
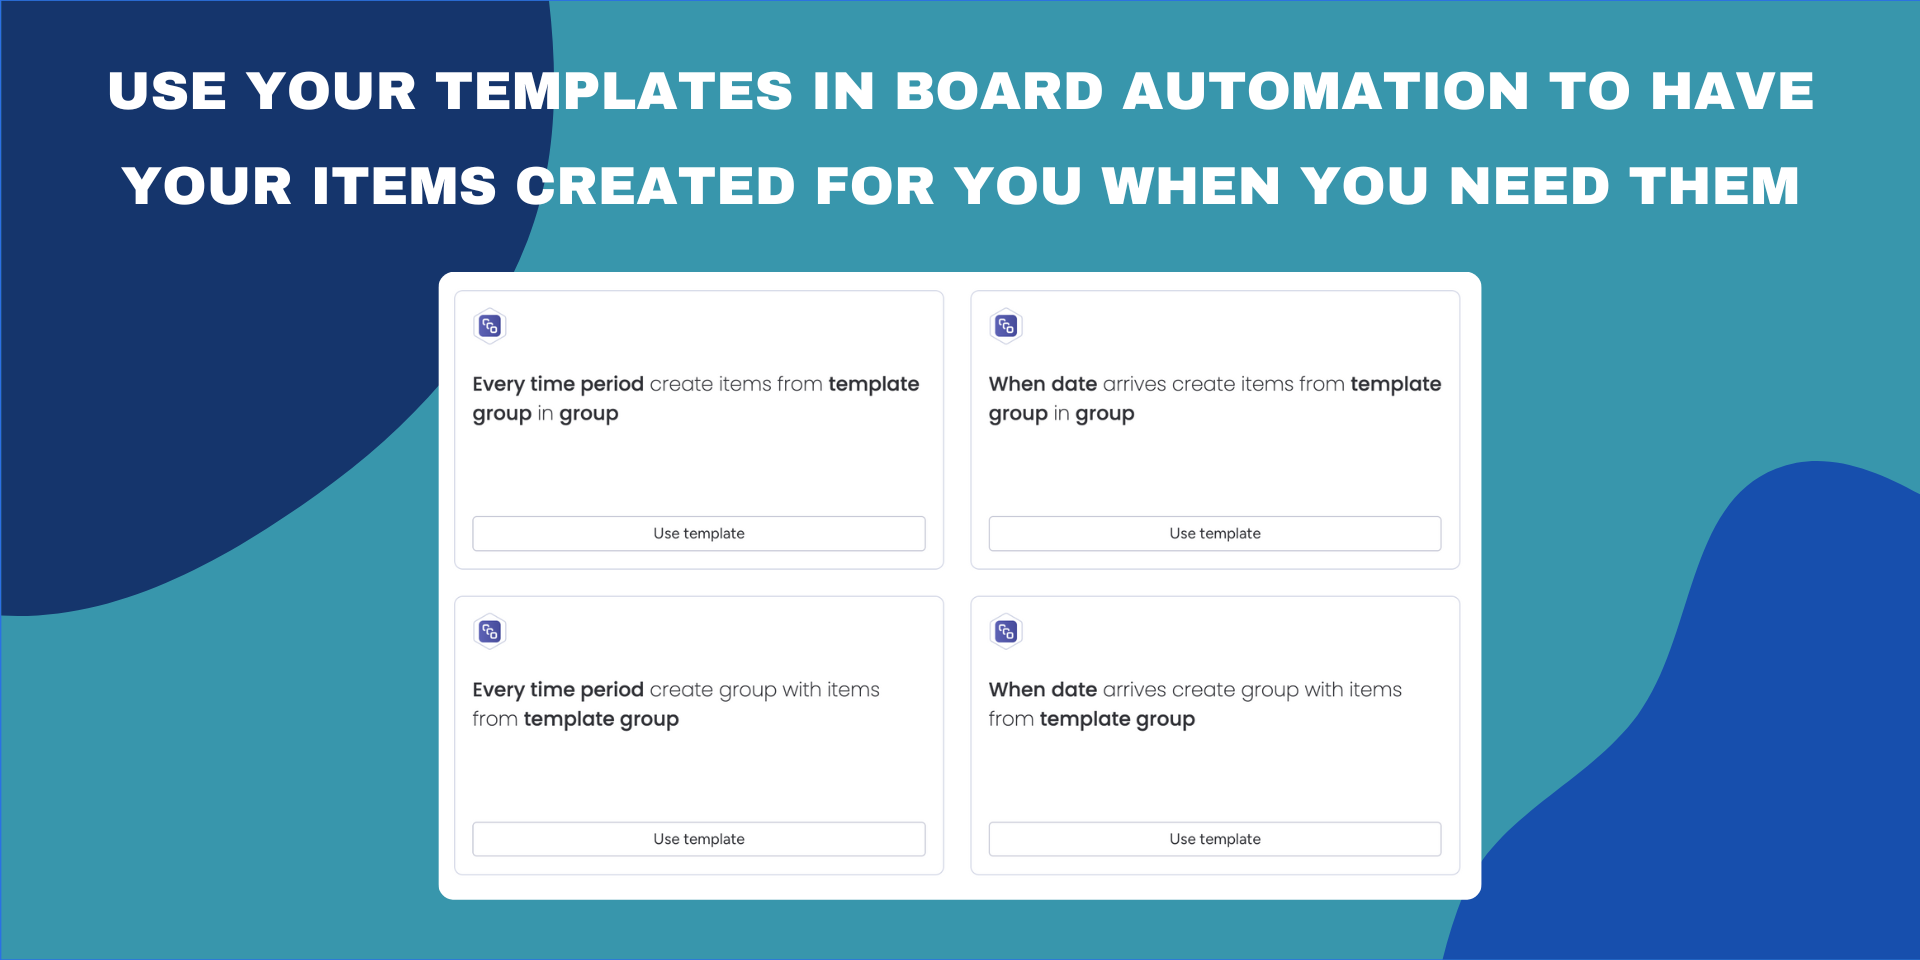
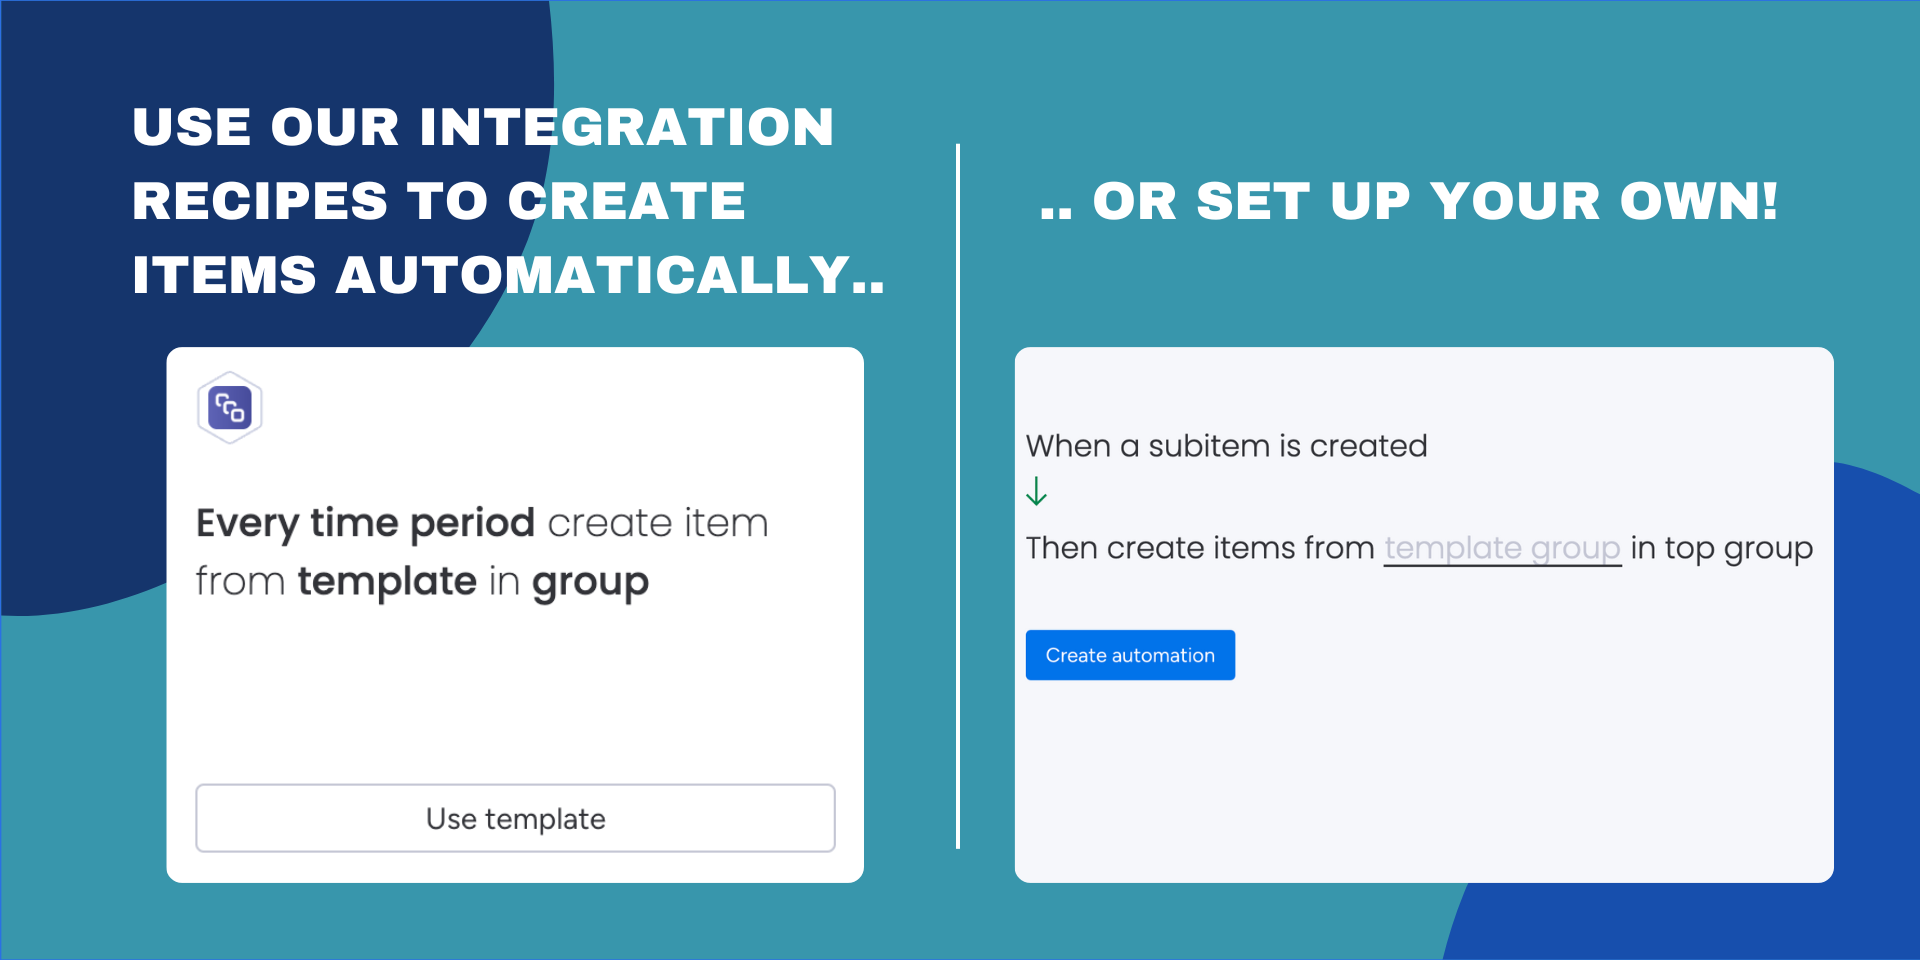
- Automation Integration: Use workflow actions in the Automation center to automate group, item, and subitem creation. Create your items right when and where you need them.
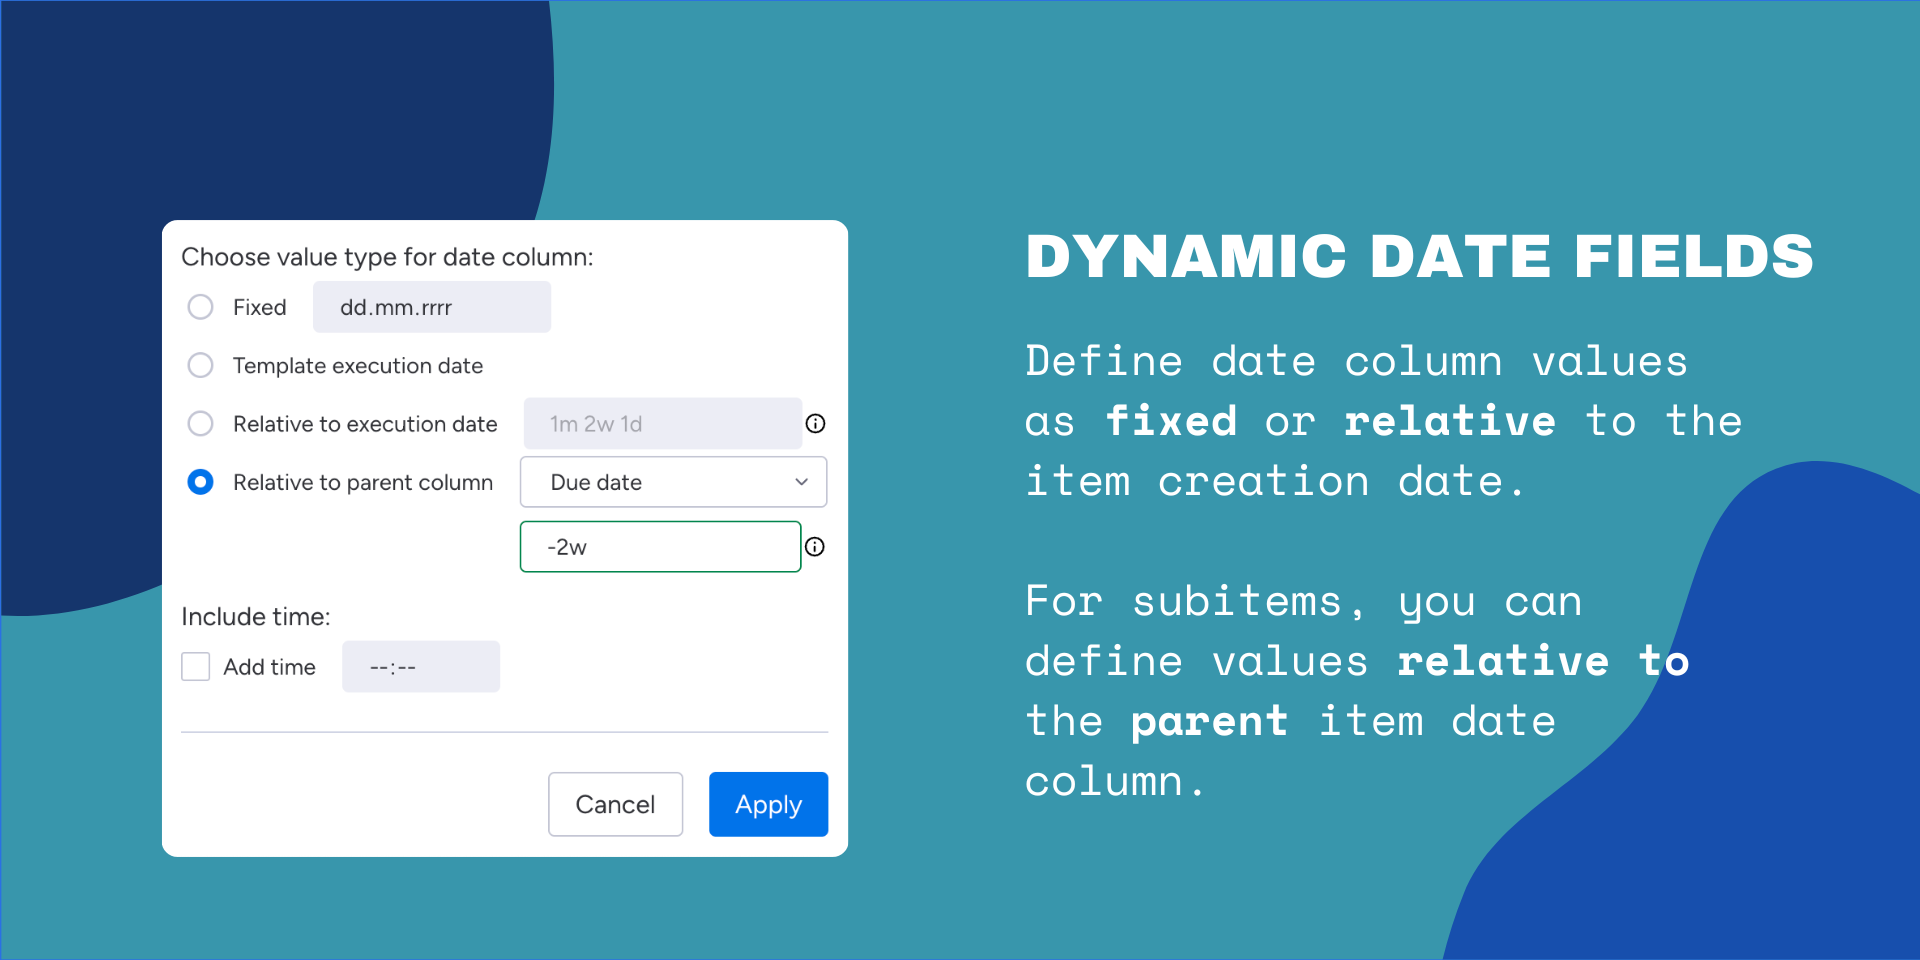
- Dynamic Date Fields: Set dates dynamically based on template execution timestamps - define the desired due dates and let Advanced Templates automatically set them for you. Define subitem dates as relative to parent item dates.
- Future Updates: Look out for upcoming features like subitem support and creating entire item groups!
Use cases
🌍 HR department
Streamline repetitive processes, such as onboarding checklists; Automate recurring activities like performance evaluations with Advanced Templates and board automation!
🙌 Customer Success
Manage customer interactions, feedback, and support tickets efficiently.
💻 Engineering
Set periodic reminders to review and update project dependencies; Use automation to follow-up a user story completion with E2E test coverage for the QA team.
Optimize your workflow management across departments with Advanced Templates and enhance your monday.com experience today!
How to use
Adding Advanced Templates view to your board
“Manage Advanced Templates” view allows you to manage your templates. To add this view to your board, please follow the steps below:
- Open the board you want to add Advanced Templates to.
- Click on the “Add” button in the top right corner of the board.
- Select “Advanced Templates” from the “Apps” submenu.
- Click “Add to board” button.
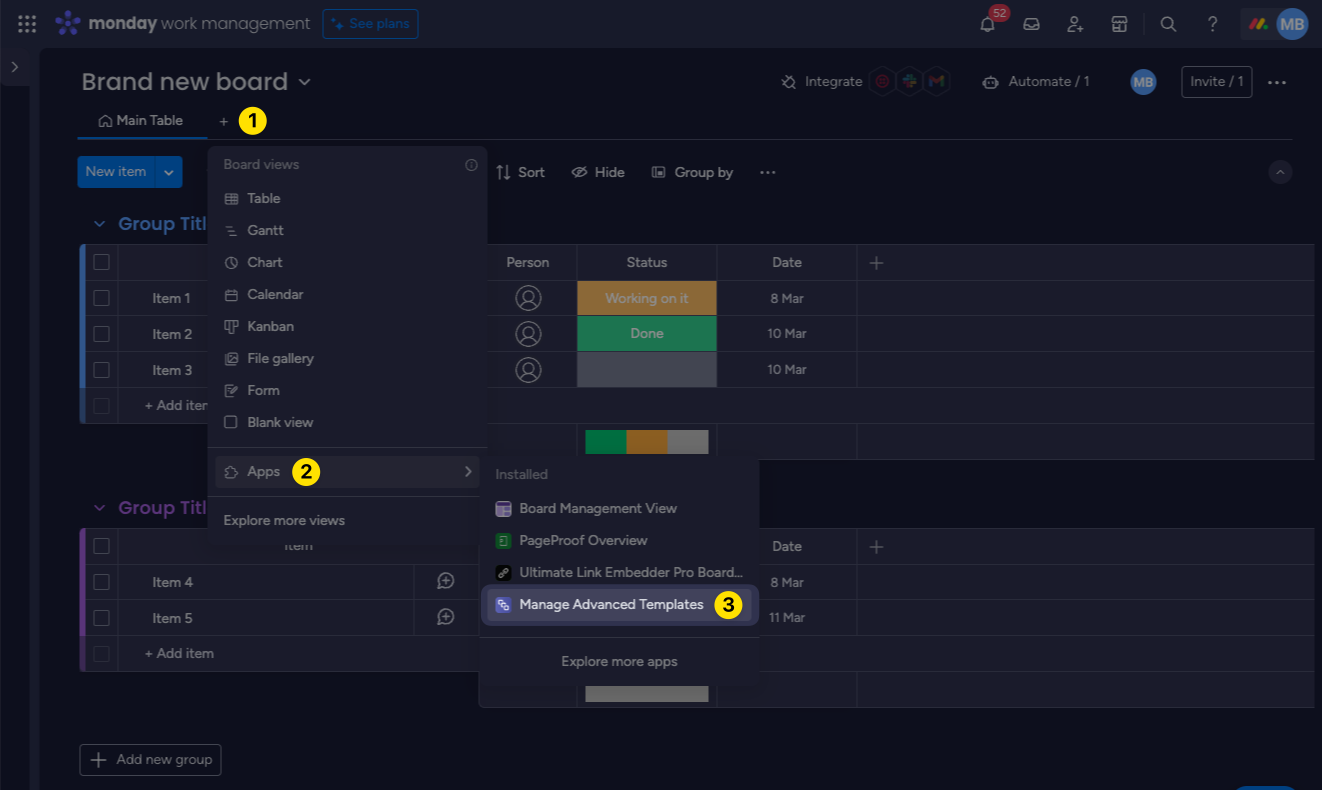
Please have a look at the video below to see how to add Advanced Templates to your board.
Creating templates from existing groups, items, and subitems
Creating template from existing item
To create a template from an existing item, please follow the steps below:
- Open the board where the item is located.
- Hover over the item you want to use for template creation and click on the three dots button.
- Select “Save as Advanced Template” from the “Apps” submenu.
- Define the name of the template.
- Define if subitems should be included in the template.
- Click “Create” button.
Please have a look at the video below to see how to create a template from an existing item.
Creating subitem template from existing subitem
To create a subitem template from an existing subitem, please follow the steps below:
- Open the board where the subitem is located.
- Expend parent item of the subitem you want to use for template creation.
- Hover over the subitem you want to use for subitem template creation and click on the three dots button.
- Select “Save as Advanced Template” from the “Apps” submenu.
- Define the name of the subitem template.
- Click “Create” button.
Please have a look at the video below to see how to create a template from an existing item.
Creating templates from selected items
To create a template from selected items, please follow the steps below:
- Open the board where the items are located.
- Select items you want to use for templates creation.
- Click “Apps” button in the selected items bottom bar.
- Select “Save as Advanced Templates” from the dropdown menu.
- Define if subitems should be included in the templates.
- CLick “Create” button.
Please have a look at the video below to see how to create a template from selected items.
Creating template group from existing group
You can create a template group from an existing group. To do so, please follow the steps below:
- Open the board where the group is located.
- Hover over the group you want to use for template creation and click on the three dots button.
- Select “Save as Template Group” from the “Apps” submenu.
- Define the name of the template group.
- Define if subitems should be included in the template group.
- Click “Create” button.
Please have a look at the video below to see how to create a template group from an existing group.
Using templates in board automations
Item creation triggered by an action in board
You can use Advanced Templates in board automations to create items based on your templates.
To create new automation please follow the steps below:
- Open the board you want to create an automation for.
- Click on the “Automate” button in the top right corner of the board.
- Switch to “Board Automations” tab.
- Click on the “Add automation” button.
- Select automation trigger.
- In the automation action select Advanced Templates “Create item from template in group”.
- Select the template you want to use.
- Select the group where you want to create the new item.
- Click “Create automation” button.
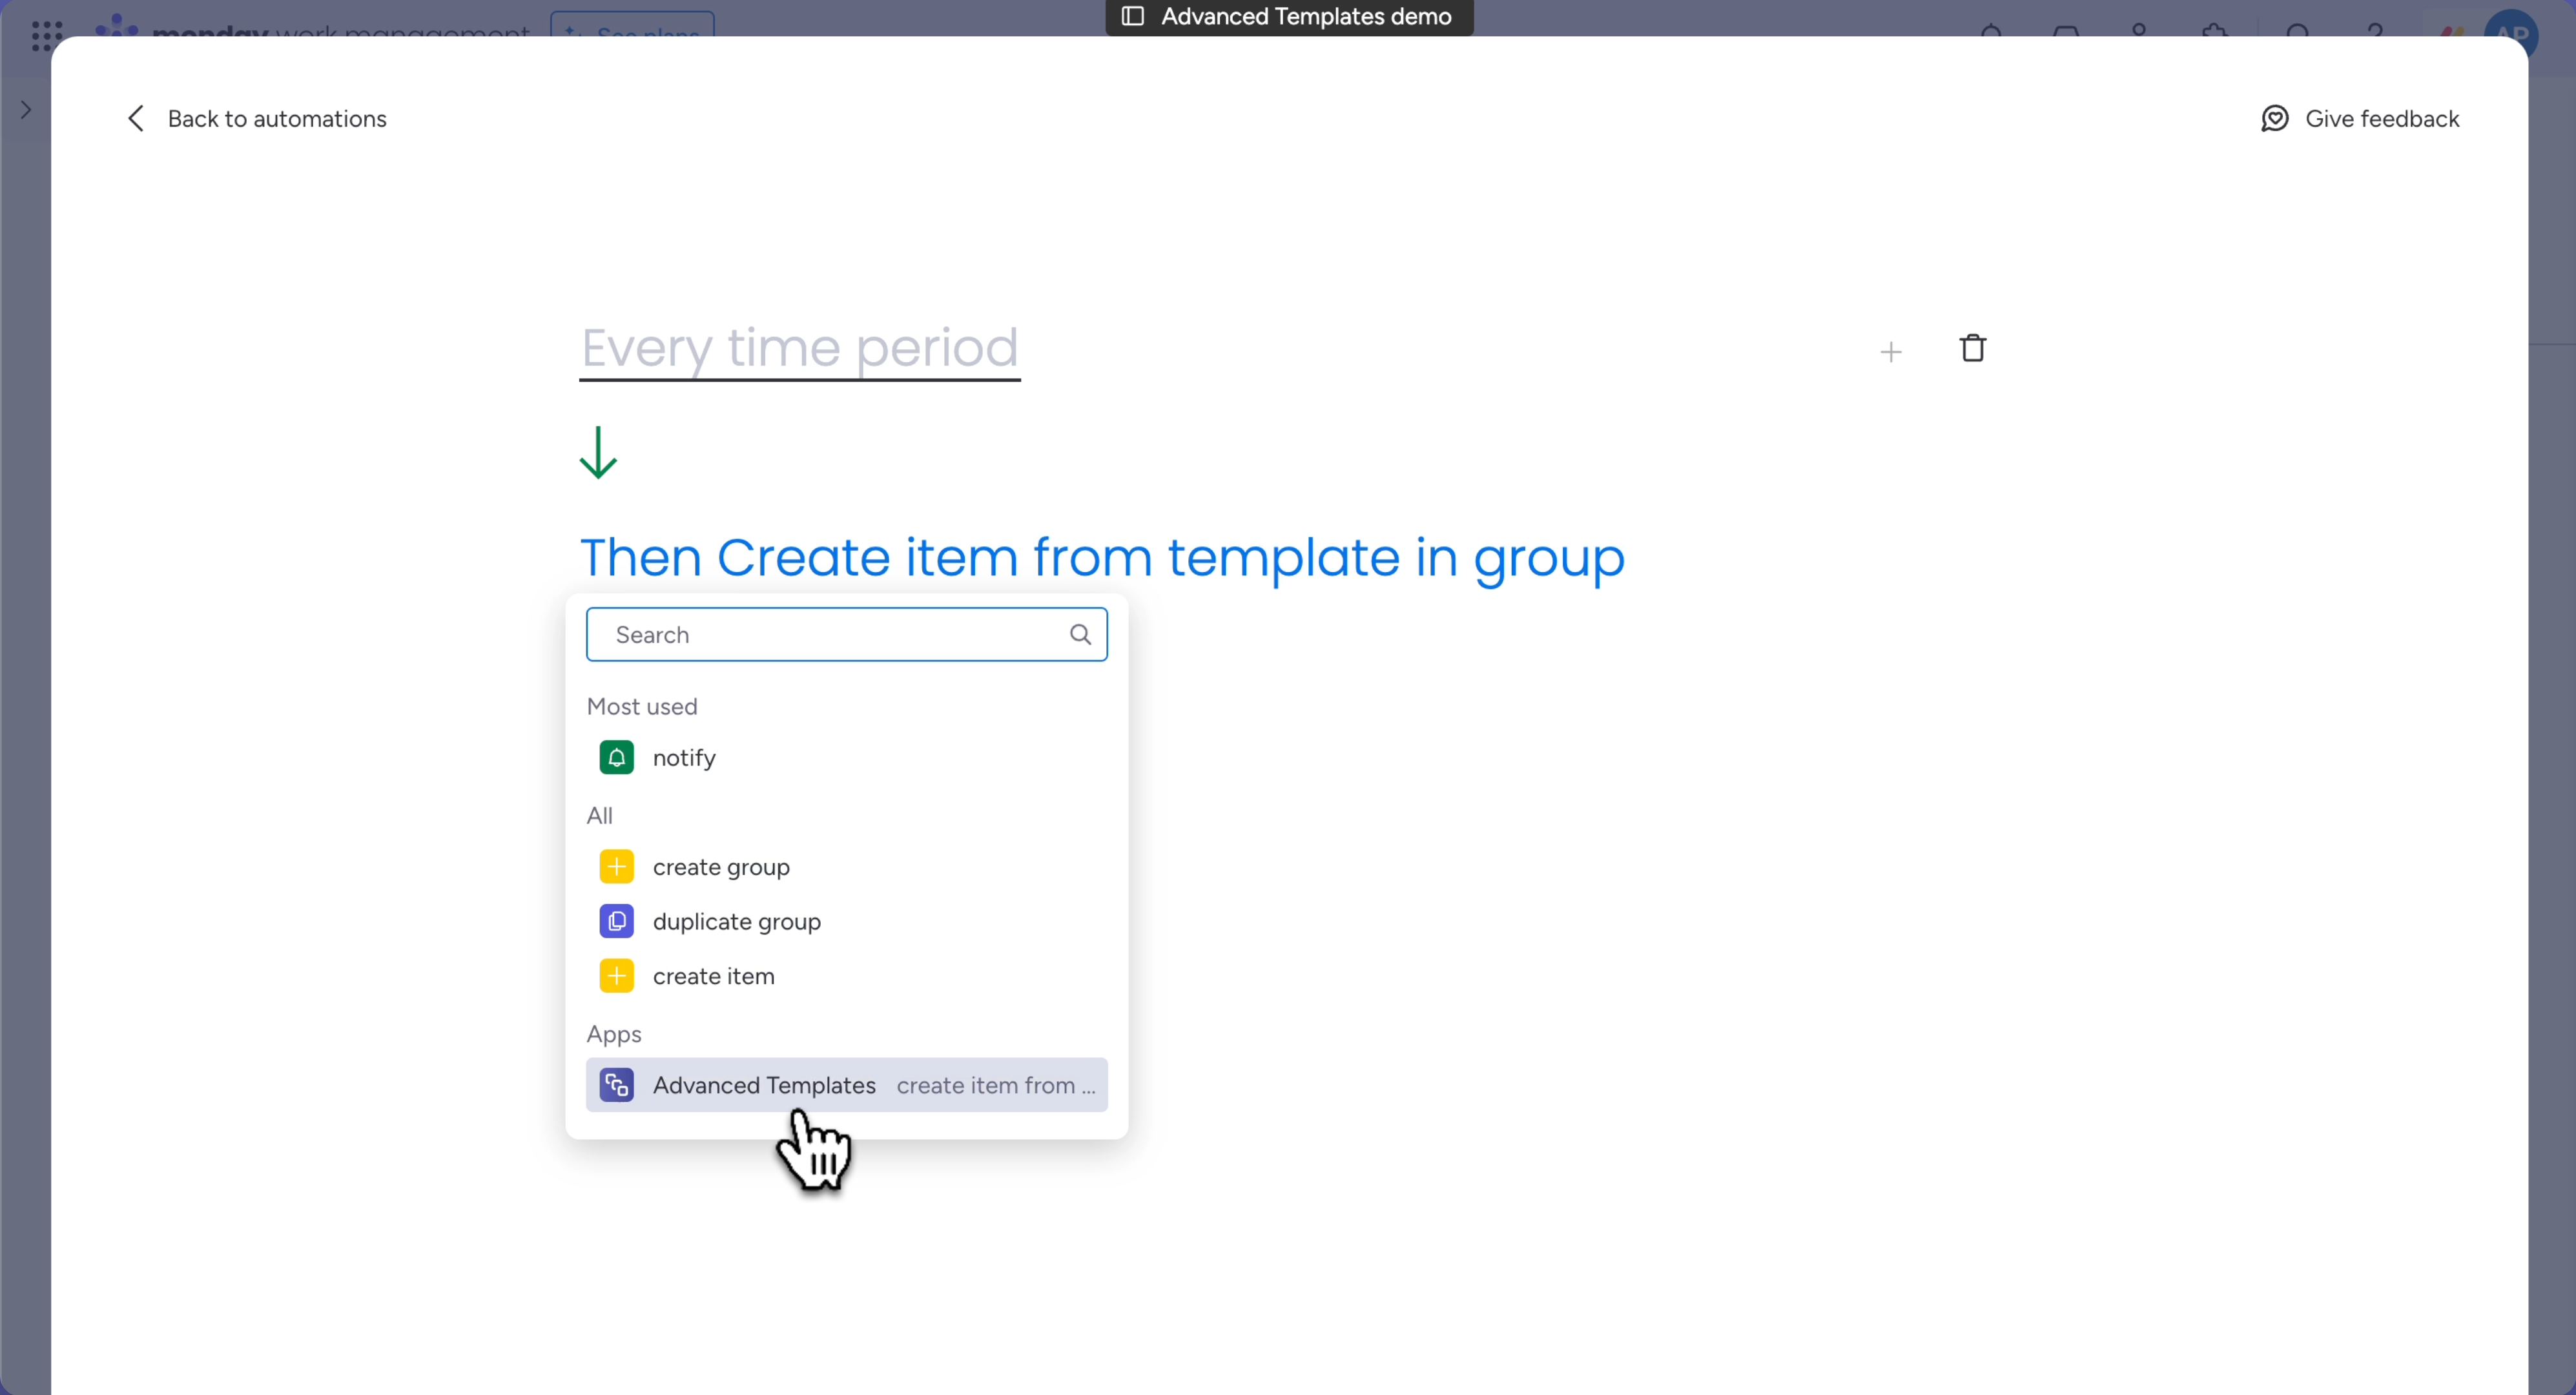
Please have a look at the video below to see how to create automation triggered by an action in board.
Applying template to newly created item
You can use Advanced Templates in board automations to apply templates to newly created items.
To create automation that applies template to newly created items please follow the steps below:
- Open the board you want to create an automation for.
- Click on the “Automate” button in the top right corner of the board.
- Click on the “Integrations” button in the bottom left corner.
- Scroll down to the “Apps” section and click on the “Advanced Templates” app.
- Find “When an item is created apply template” recipe and click “Use template” button.
- Select the template you want to apply.
- Click “Create automation” button.
Please have a look at the video below to see how to create automation that applies template to newly created items.
Automatic item creation in multiple boards
In this “How to” video, we demonstrate the powerful functionality of Advanced Templates in monday.com, specifically focusing on creating templates for different departments and automating workflows across multiple boards.
Steps:
- Overview of HR Template: We defined an HR template with subitems like sending a welcome email, signing the contract, and signing the NDA.
- Overview of IT Template: We set up an IT template that includes tasks like preparing a notebook, setting up an external display, and configuring the domain account.
- Automation: We schedule an automation so that when a new item is added to the HR board, the HR template is applied, and a new item is automatically created in the IT board using the IT template. The name of the IT item is dynamically calculated, using the employee’s name from the HR board, ensuring seamless coordination between both departments.
Please have a look at the video below to see how to create items in multiple boards
Automatic subitem creation
You can automate the creation of individual subitems or entire subitem groups using templates.
How to Set It Up:
- Define a Subitem Template: Create your subitem templates in Advanced Templates.
- Open the Automation Center: Go to the Automation Center for the board where you want to set up subitem creation.
- Set a Trigger: Define the trigger that will activate your automation.
- Choose an Action: Select the “Create subitems from subitem template group” action.
- Save Your Automation: Click the “Create automation” button, and you’re all set!
Please have a look at the video below to see how to schedule automatic subitem creation.
Manual creation
Creating new groups from group templates
You can create new groups from your template group. To do so, please follow the steps below:
- Open Advanced Templates for the board you want to create a new group in.
- Hover over the template group you want to use and click on the three dots button.
- Select “Create group and items” from the dropdown menu.
Please have a look at the video below to see how to create new groups from template group.
Creating new items from templates manually
You can create new items from your templates manually. To do so, please follow the steps below:
- Open Advanced Templates for the board you want to create a new item in.
- Hover over the template you want to use and click on the three dots button.
- Select “Create now” from the dropdown menu.
- Define target group for new item
- You can also override item name
- Click “Create item” button.
Please have a look at the video below to see how to create new items from templates manually.
Create new subitem from template manually
You can create new subitem from your templates manually. To do so, please follow the steps below:
- Open the board you want to create a new item in.
- Hover over the parent item you want to create a new subitem in and click on the three dots button.
- Select “Create subitem from template” from the dropdown menu.
- Select the template you want to use.
- Click “Create subitem” button.
Please have a look at the video below to see how to create new subitem from template manually.
Manual creation of recurring items from a template
You can create recurring items from your templates. To do so, please follow the steps below:
- Open Advanced Templates for the board you want to create a new item in.
- Hover over the template you want to use and click on the three dots button.
- Select “Create recurring item” from the dropdown menu.
- Define the start date
- Define recurrence options (daily, weekly, monthly)
- Define and date or number of recurrences
- Click “Create items” button.
Please have a look at the video below to see how to create five recurring items with due date set to the end of the month.
Manual creation of separate items for each assignee
For tasks that have to be done by each employee, you can create separate items for each selected assignee. This feature might be useful for following processes:
- Onboarding
- Performance reviews
- Training
- Timesheet submission
- etc.
To create separate item for each assignee, please follow the steps below:
- Open Advanced Templates for the board you want to create a new item in.
- Hover over the template you want to use and click on the three dots button.
- Select “Create for many assignees” from the dropdown menu.
- Define assignee column to use for item creation.
- Select assignees you want to create items for. These can be both people and teams.
- Define if separate items should be created for each team member. To do so make sure that “Create separate item for each member of selected teams” is checked.
- Click “Create items” button.
Please have a look at the video below to see how to create separate items for each assignee.
Creating items from templates without leaving the board
You can create items from templates without leaving the board. To do so, please follow the steps below:
- Open the board you want to create an item in.
- Hover over the group you want to create an item in and click on the three dots button.
- Select “Create item from template” from the Apps menu.
- Select the template you want to use.
- Click “Create item” button.
Please have a look at the video below to see how to create items from templates without leaving the board.
Managing templates
Supported column types
Advanced templates supports the following column types:
- The Text Column
- The Item Name Column
- The Date Column
- The Numbers Column
- The Status Column
- The Long Text
- The Tags
- The Dropdown Column
- The Link Column
- The Email Column
- The Checkbox Column
- The People Column
- The Timeline
More column types will be supported in the future.
Setting values for date columns
Execution time
When selected then value of the date column will be set to the time of item creation.
Fixed due date
When selected then every item created from this template will have the same due date.
Due date relative to execution time
When selected then due date will be relative to the time of item creation. For example, if you set due date to 2w (2 weeks) then due date will be set to 2 weeks after item creation.
Here are some examples of due date values:
- 1d - 1 day
- 1w - 1 week
- 1m - 1 month
- 1m 2w 3d - 1 month, 2 weeks, 3 days
Please have a look at the video below to see how relative due date works.
Due date relative to parent item due date (only for subitems)
When selected then due date will be relative to the due date of the parent item. If expression starts with minus sign then due date will be set before parent item due date. For example, if you set due date to -2w then due date will be set to 2 weeks before parent item due date.
Here are some examples of due date values:
- 1d - 1 day after parent item due date
- 1w - 1 week after parent item due date
- 1m - 1 month after parent item due date
- 1m 2w 3d - 1 month, 2 weeks, 3 days after parent item due date
- -1w 2d - 1 week and 2 days before parent item due date
Please have a look at the video below to see how you can utilize due date relative to parent item due date.
Copying templates to other boards
If you want to use the same template in another board, you can copy it. To do so, please follow the steps below:
- Open Advanced Templates for the board where the template is located.
- Hover over the template you want to copy and click on the three dots button.
- Select “Copy to board” from the dropdown menu.
- Select the board where you want to copy the template.
- Define column mapping between boards.
- Click “Copy template” button.
Please have a look at the video below to see how to copy templates to other boards.
Inheritance for the People column in subitems
This feature allows subitems to pull People column values from their parent items automatically.
Follow these steps to set up value inheritance for the People column:
- Open the Subitem Template. Start by opening the subitem template where you want to set up value inheritance.
- Click on the People Column Cell. Locate the People column in the subitem template and click on its cell.
- Set the Value Type to Derived. From the dropdown menu that appears, select ‘Derived’ as the value type.
- Select the Parent Item Column. Pick the column from the parent item that should serve as the source for the subitem’s People column.
Check out the demo below to see these steps in action. Start using value inheritance today to simplify and streamline your workflows!
Derive Subitem Text Column Values from Parent Items
You can now derive subitem text column values directly from parent item column values. 🎉
Follow these steps to set up value inheritance for text columns:
- Create a New Subitem Template
- Edit an Existing Text Column
- Press “@” and choose the parent item column you’d like to reference
Check out the demo below to see these steps in action:
Connect Boards Columns in Advanced Templates
Connect Boards columns are now supported in Advanced Templates, making it easier than ever to link templates to existing items on your boards. Whether you’re working with main items or subitems, this feature helps streamline your workflows and keeps everything connected.
Steps to Set a Value for a Connect Boards Column:
- Open the template where you want to use the Connect Boards column.
- Click on the Connect Boards column cell. Select an existing item from the connected board, such as a customer, project, or any relevant item. That’s it! The selected item will now be linked whenever the template is used.
💡 Tip: This works for subitem templates too, making it perfect for more detailed workflows.
📺 Watch the Video Below Check out this video tutorial for a visual walkthrough of setting up and using Connect Boards columns.
Setting up an OAuth token for Advanced Templates
OAuth token will allow Advanced Templates to run complex automations that may take longer than the default 5-minute restriction of the short-lived token. This is necessary for automations involving complex structures that need to generate more than 40 items or subitems at once.
To generate an OAuth token, please follow the steps below:
- Open the Advanced Templates App – Start by opening our app in your monday.com workspace.
- Click on the Settings Icon – Look for the small cog icon to open the settings menu.
- Click “Go to App Settings” – This will bring you to the page where you can manage authorization settings.
- Click “Grant access token to Advanced Templates” – This will generate a new OAuth token that you can use to authorize our app.
- Review All Required Privileges – You’ll see a list of permissions that our app needs to run efficiently. These allow the app to create and manage your item structures properly. Make sure you’re comfortable with each of these permissions.
- Click “Authorize” – Once you’re ready, hit the “Authorize” button to give our app the access it needs.
- Return to the App – After authorizing, go back to the main app screen. You’re all set up!
With these simple steps, your Advanced Templates app is ready to support more powerful automations and workflows!
Note
If you ever need to remove our app’s access, simply go back to the App Settings and click “Revoke access token.” This will delete the OAuth token and remove our app’s access to your account.
Please have a look at the video below to see how to set up an OAuth token for Advanced Templates.
Privacy policy
Application stores defined templates and execution history in monday.com application storage. Advanced Templates reads board data via monday API to convert existing items into templates. Servers involved in data processing are deployed on monday.com code platform.
Pricing
Application has 14 days FREE trial.
Existing pricing plans are available at Advanced Templates marketplace listing .
App gallery
Feedback
If there’s a feature you’d like use to implement, we’d love to hear from you! Please send an email to team@apmdsoft.com .
